
Desmond Backpack Sew Along Step 3 – Front Zipper Pocket
I hope everyone had a great weekend! This is the third step in my Desmond Backpack sew along. Picking up where we left off last week, we are going to continue construction on the exterior of the pack and make the front zipper pocket. If you need to look back at the previous two steps, you can see them here: Step 1, Step 2. The pattern is available in my Supply Shop for anyone who wants to join in the fun. Let’s get sewing!
Front Zipper Pocket
Cut two pieces of webbing 4″ long. If using synthetic webbing (nylon, polypropylene, etc.), melt each cut end of webbing to prevent fraying. Don’t worry if you are using natural fiber webbing. The frayed edges will not be visible on the outside of the pack. You could always run a line of stitching (using a short stitch length) very close to the ends of your webbing as a safety stitch to keep the webbing from unraveling further. Do this before sewing the steps in this post. The ends of the webbing will be concealed under the zipper pocket.
Fold each piece of webbing in half over a D-Ring. Place each piece of folded webbing within D-Ring placement markings on right side of exterior piece A. Baste in place 1/4″ from edge of webbing. (Optional: if using lightweight fabric, reinforce wrong side of fabric behind D-Ring attachment area with fusible interfacing.)
Finish all edges of pocket pieces C and D with an overlock or zig-zag stitch.
With right sides together, sew top of piece C to bottom of piece D using 3/4″ seam allowance with the following stitch length adjustments: From the edge of the fabric to the first zipper end mark, sew with normal (around 2.5) stitch length and backtack where indicated in the pattern directions. Between zipper end marks sew with long basting stitches (above 4). From the last zipper end mark to the other side of the fabric, sew again with normal stitches, backtack/back stitch at zipper end mark. Press seam open.
Center zipper between zipper end marks aligning zipper stops with end marks, right side down, on top of seam. The zipper pull can be oriented in either direction depending on personal preference. Pin in place. I actually used little clips to hold my zipper in place. Sometimes pins can distort the zipper tape too much.
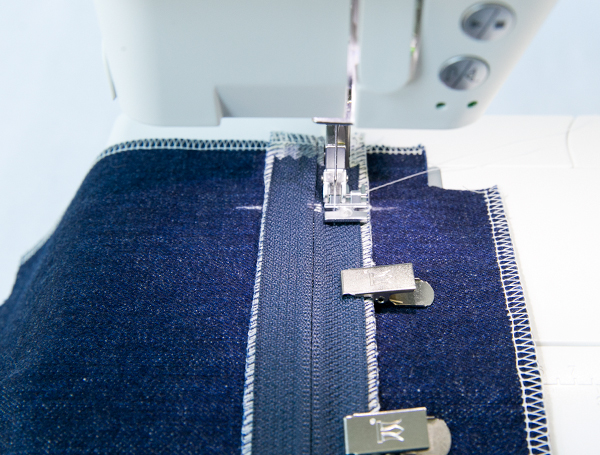
Stitch zipper tape in place 1/4″ from center of zipper teeth on each side of zipper. Stitch from one zipper stop to the other zipper stop, leaving ends of zipper tape free.
Turn pocket to right side. Feel through the layers to locate the zipper stops, and using chalk or fabric safe marking pen, mark across zipper stops on right side of pocket pieces C and D. Sew 5 lines of close straight stitching (like a back tack) (or use a bar tack) through the right sides of pieces C and D, catching the seam allowance and zipper tape below. Start and stop stitching at stitch lines created when attaching the zipper. Be careful not to hit the zipper stops.
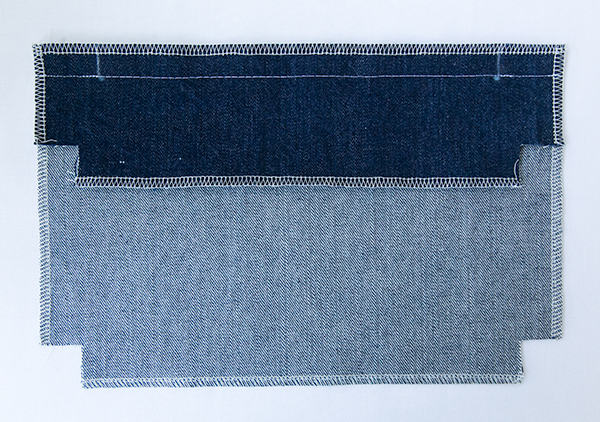
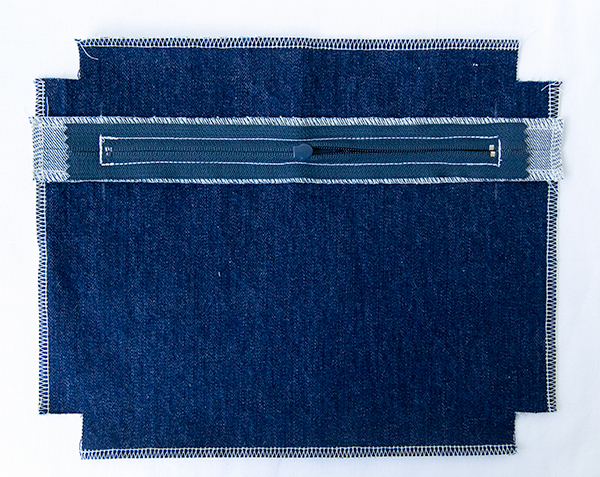
Here is what the backside should look like.
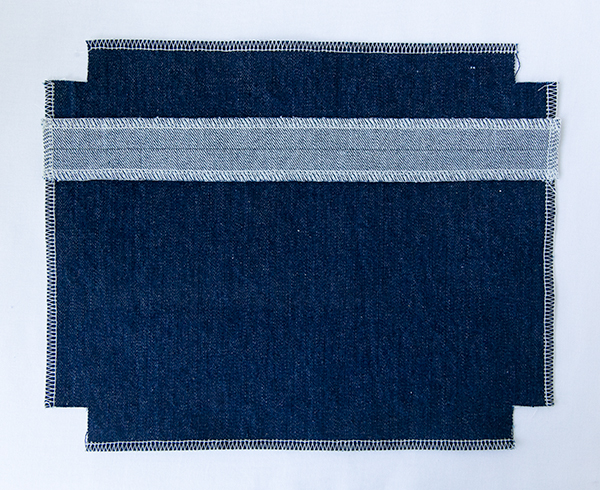
And the front side.
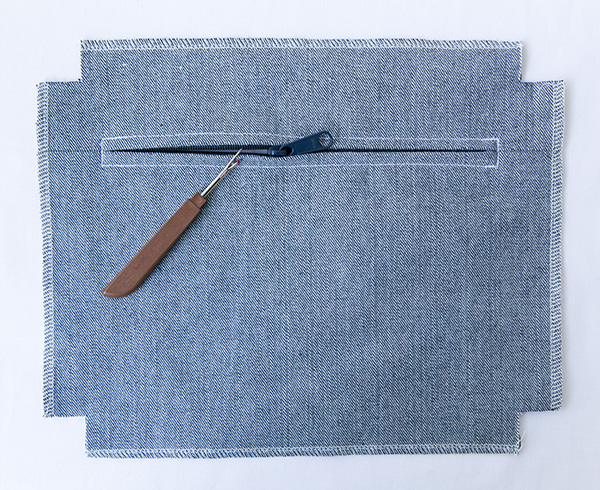
Remove basting stitches between zipper end marks.
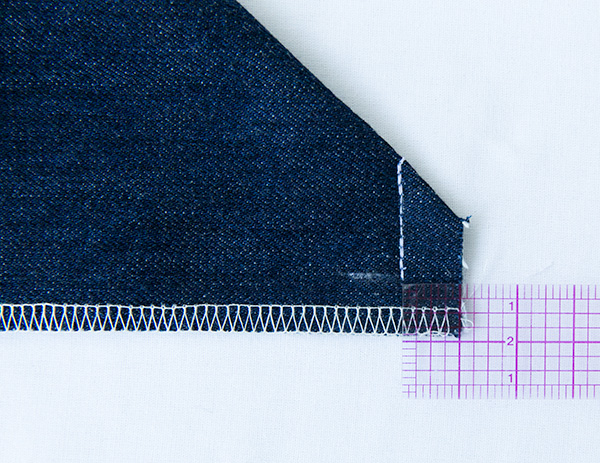
Turn pocket to the wrong side. Fold each corner cutout so right sides are together, and sew each corner using 1/2″ seam allowance, stopping 1/2″ from the bottom.
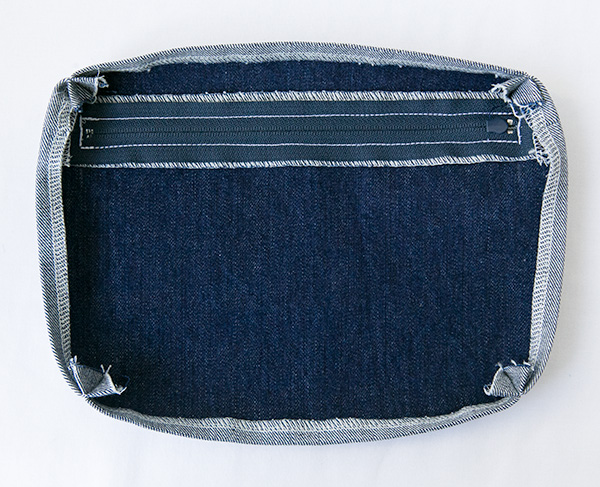
Using a ruler as a guide, press under 1/2″ seam allowance all the way around the pocket to the wrong side. Press open corner seam allowance as much as possible, distributing evenly on either side of the seam.
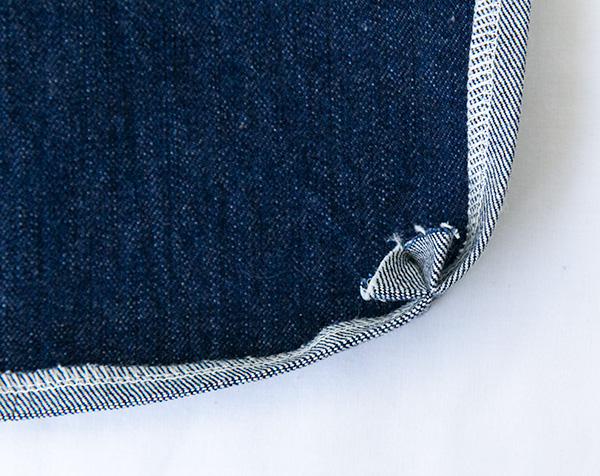
A close up of what the corner looks like. Tip: if working with extra thick fabric, trim extra bulk out of corners if it helps with positioning and attaching the pocket.
Place front zipper pocket within placement markings on right side of exterior piece A. Pin in place if necesary. Starting along top edge, edge-stitch top edge of pocket in place from one corner to the other. Do the same for the right and left sides of the pocket. This will help keep the pocket square and in place.
Tip: If working with extra thick fabric, rather than sewing from corner to corner, start sewing from the middle out to the corners. Sometimes it is easier for a presser foot to sew into a thick area, rather than start on top of one.
Tuck corner seam allowance inside as you sew. Then edge-stitch the bottom of the pocket using placement lines as a guide. Add a second row of stitches on top of the first row all the way around the pocket for reinforcement.
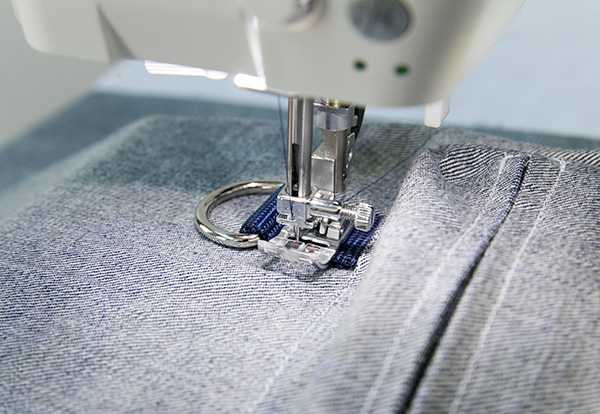
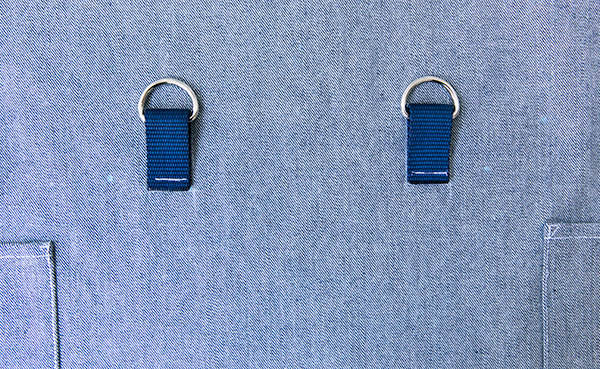
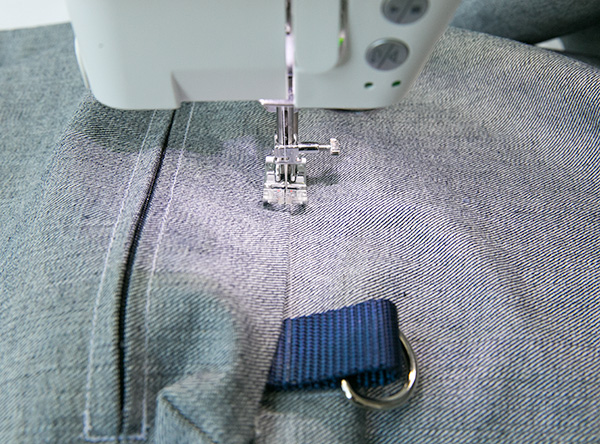
With D-Ring pushed to the top of webbing loop, sew 5 rows of close straight stitches through both layers of webbing and exterior piece A across bottom of D-Ring. Start stitching on the right side of the D-Ring, and stop with the needle down on the left side of the D-Ring after the 5th row of stitching. (Moving the needle, or using a narrow presser foot might be helpful for this step to get closer to the D-Ring).
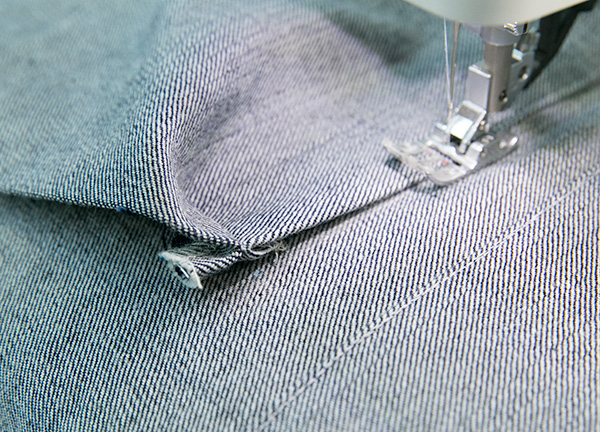
With needle down, and referring to (Figure 9) in the pattern directions, pivot at #1 and sew to #2. Follow the numbers in (Figure 9) to sew an X-pattern, stopping at each number with the needle down, and pivoting to sew towards the next number.

The stitches are hard to see with my matching thread color, but hopefully you get the idea. Repeat for other D-Ring.
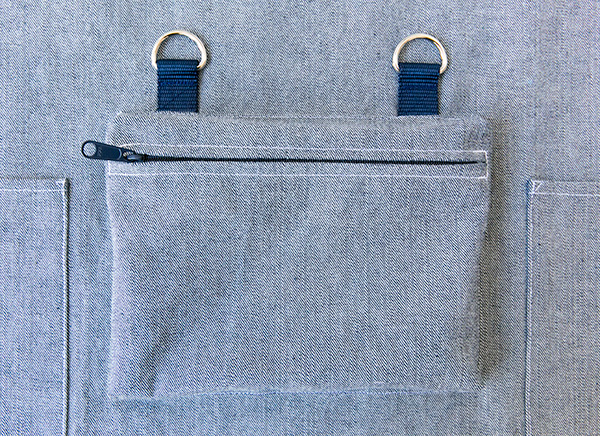
Here is what the front zipper pocket should look like at this point. Now the front (and sides) of the exterior of the pack are complete. You can set this aside for now. Thursday we will start work on the back of the exterior of the pack, which includes all of the straps.
Feel free to get in touch if you have any questions about the pattern or sew along.
Beautiful work. When are you going to post more?