
Desmond Backpack Sew Along Step 7 – Lining Pockets
With the exterior of the pack finished, it’s time to start working on the lining. Several of the same pattern pieces that we used for the exterior of the pack are also used for the lining. Since it essentially takes on the same shape as the exterior of the pack, the directions for completing parts of the lining are almost the same as the exterior construction, but with some small adjustments.
Lining Side Pockets
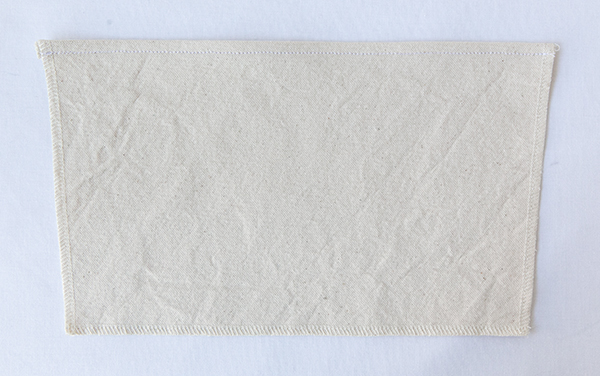
Finish all edges of lining pocket pieces E with an overlock or zig zag stitch.
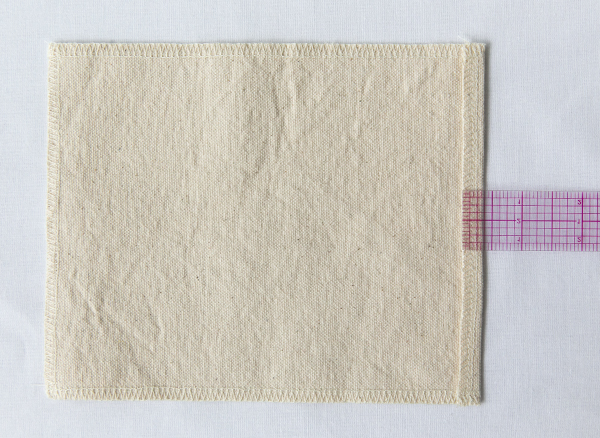
Fold over 3/8″ at the top of each pocket piece E to the wrong side of the fabric and press flat.
Repeat, folding over and pressing another 3/8″ to the wrong side.
Top-stitch folded layers down from the right side 1/4″ from folded edge at top of pocket.
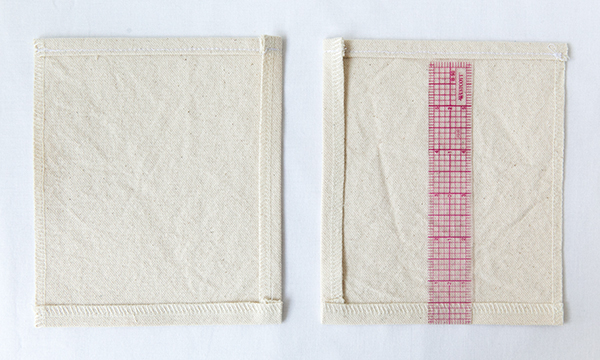
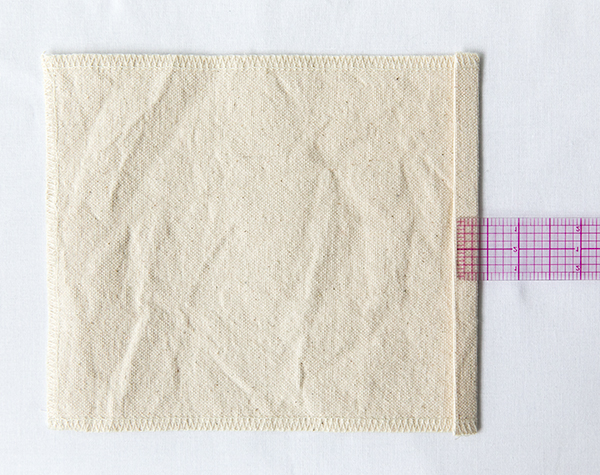
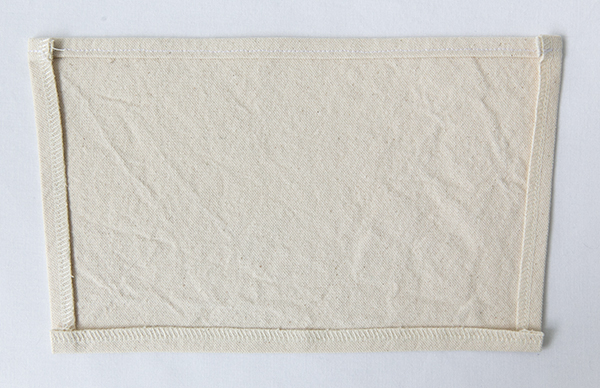
Fold under 1/2″ seam allowance on the left side of one pocket piece, and 1/2″ seam allowance on the right side of the other pocket piece. Press flat to wrong side. Fold under 1/2″ seam allowance on the bottom of each pocket piece. Press flat to wrong side.
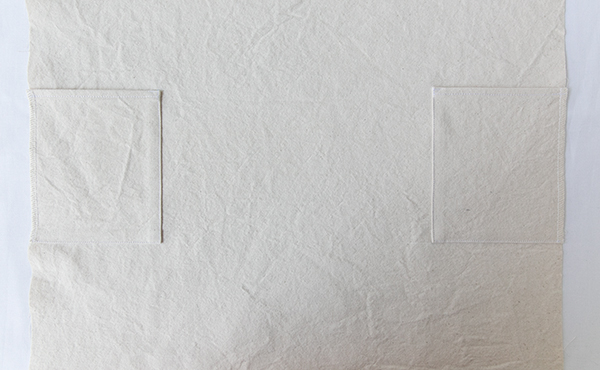
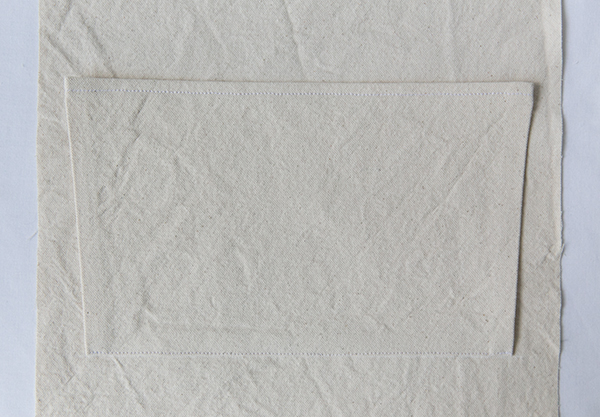
Turn pocket pieces E so that the right sides are facing up. Align pocket pieces E with lining side pocket placement lines, and pin in place to right side of lining piece A. Pressed under side edges of pockets should be facing the interior of lining piece A.
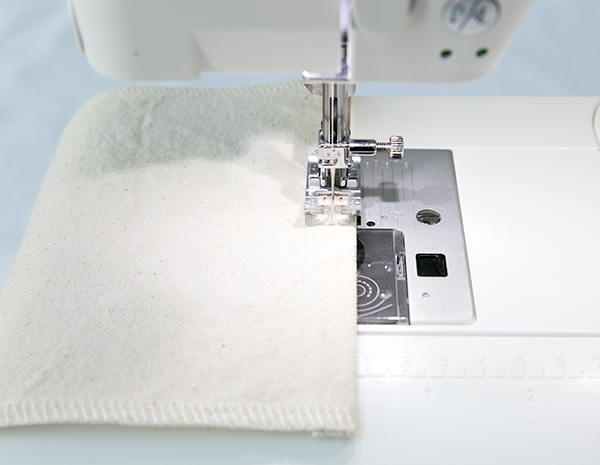
Edge-stitch pieces E in place along the pressed under side and bottom of each pocket. Add a second row of stitches on top of first row for reinforcement. Reinforce top corner of each pocket using (Figure 2) in the pattern directions for reference.
Baste opposite side edges 1/4″ from raw edges.
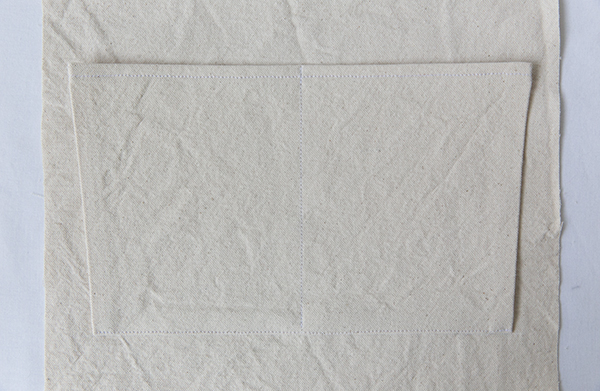
Back Lining Pocket
Finish all edges of lining pocket piece F with an overlock or zigzag stitch.
Following the same procedure as the side pockets above, fold over 3/8″ at the top of pocket piece F to the wrong side of fabric and press flat. Repeat, folding over and pressing another 3/8″ to the wrong side. Top-stitch folded layers down from the right side 1/4″ from folded edge at top of pocket.
Fold under 1/2″ seam allowance on left, right, and bottom edges of pocket piece F. Press flat to wrong side.
Turn pocket piece F so right side is facing up. Align pocket piece F with pocket placement lines on lining piece B. The sides of the pocket are cut at an angle and won’t align just yet, but make sure pocket piece F is accurately placed along the bottom placement line. Pin in place to right side of lining piece B. Pressed under bottom edge should be facing down.
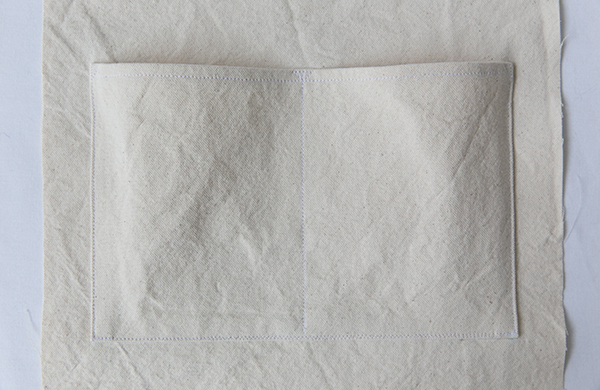
Edge-stitch pocket piece F to lining piece B along the bottom edge first.
Then sew vertically along the stitch line to divide pocket piece F in half.
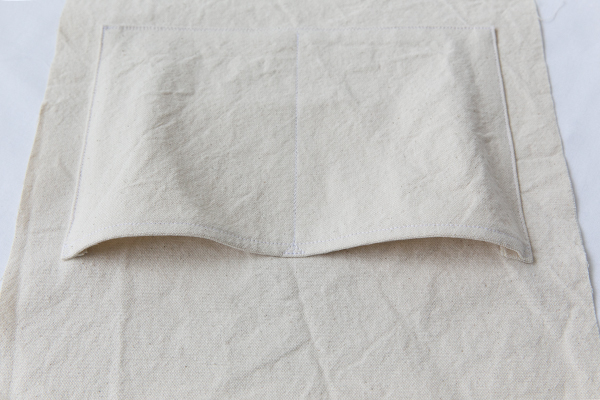
Bring each side of pocket piece F in line with the right and left side placement markings. Edge-stitch each side of pocket in place. The pocket will not lay flat, as the angled sides create some extra room in the pocket for thicker objects.
Reinforce top corners and center of pocket.
Add a second row of stitches on top of first row for reinforcement on the sides and bottom of the pocket, as well as the center dividing stitch line.
That completes all of the lining pockets. On Thursday we will put the lining pieces together, and get them ready for attachment to the exterior of the pack. There are only two or three more steps after this one, so hang in there! We are getting closer to finishing the pack!
Desmond Backpack pattern available in the Supply Shop.