Skip to Main Content
Home
About
Contact
Blog
Supply Shop
Jeans Buttons and Rivets
Topstitching Thread
Zippers
Patterns and Hardware Kits
Keep in Touch:
Home
About
Contact
Blog
Supply Shop
Jeans Buttons and Rivets
Topstitching Thread
Zippers
Patterns and Hardware Kits
Shopping Cart
Miscellaneous
TaylorTailor Around the Internet
February 25, 2015
Menswear & Project Inspiration
May 6, 2014
Shoe Bags + Self Interview
March 17, 2014
Overdyed Denim Collaboration
November 15, 2013
Taylor Tailor on Denim Hunters
June 14, 2013
Breakfast for Dinner
January 21, 2013
Getting Started: Making Your Own Clothes
December 29, 2012
Cotton: in the “Wild”
October 16, 2012
New Taylor Tailor Design!
August 27, 2012
Canvas Dying
August 6, 2012
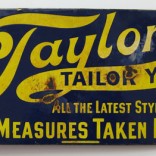
Vintage Taylor Tailor Sign
December 8, 2011
Where Do Clothes Come From?
August 30, 2011
More Posts:
1
2
Next »
Subscribe
Subscribe to receive new posts directly in your inbox:
Categories
Categories
Select Category
Accessories (13)
Desmond Pack Sew Along (10)
Jackets (7)
Mid-Project Updates (1)
Miscellaneous (24)
Pants (11)
Patterns (14)
Projects (32)
Shirts (6)
Stitches (2)
Supply Shop (1)
The Sewing Party (3)
Tools (3)
Travel (2)
Tutorials (2)
Archives
Archives
Select Month
October 2020
December 2017
December 2016
December 2015
November 2015
October 2015
August 2015
July 2015
June 2015
April 2015
February 2015
November 2014
September 2014
August 2014
May 2014
March 2014
February 2014
January 2014
December 2013
November 2013
September 2013
July 2013
June 2013
May 2013
April 2013
March 2013
February 2013
January 2013
December 2012
November 2012
October 2012
September 2012
August 2012
April 2012
February 2012
January 2012
December 2011
November 2011
October 2011
September 2011
August 2011
July 2011
June 2011
May 2011
April 2011
March 2011
February 2011
January 2011
December 2010
November 2010
October 2010
September 2010
August 2010
July 2010
June 2010
May 2010
April 2010
March 2010
February 2010
January 2010
December 2009