Men’s Jeans Sloper and Pattern
I decided I wanted to start from scratch and make my own jeans pattern after not being completely happy with the results of the Burda 7733. I’ve also realized that this hobby is not just about sewing for me, but rather the entire process of making a garment from start to finish. That process includes designing/drafting my own patterns, picking out the fabric, sourcing notions, etc., and then the sewing. While sewing is obviously important and fun, it is only one of many steps involved in the process of creating a garment…and I want to do it ALL!
I didn’t really know anything about pattern making, but after scouring the internet for resources, I eventually settled on a book called The Practical Guide to Patternmaking for Fashion Designers: Menswear by Lori A. Knowles. It is a great resource for anyone wanting to make menswear, and was essential for helping me to make my own jeans pattern.
The first step in the pattern making process was using measurements taken directly from my body to draft a lower body sloper. I learned that a sloper is a very basic pattern, without any pockets or details, that provides a general shape and starting point for creating more “stylized” and finished patterns. From the sloper, you can draft actual pattern peices creating any style you want. It is a building block of sorts that can be used over and over.
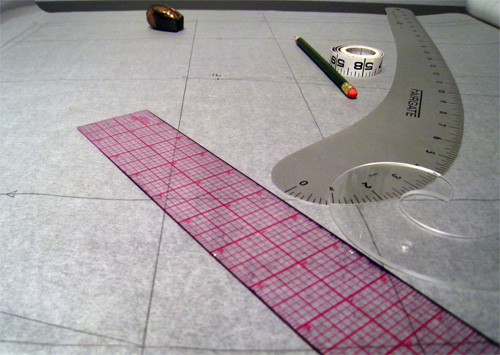
I needed an assortment of curves and rulers to draft the lower body sloper. It felt like a geometry project from high school at first.
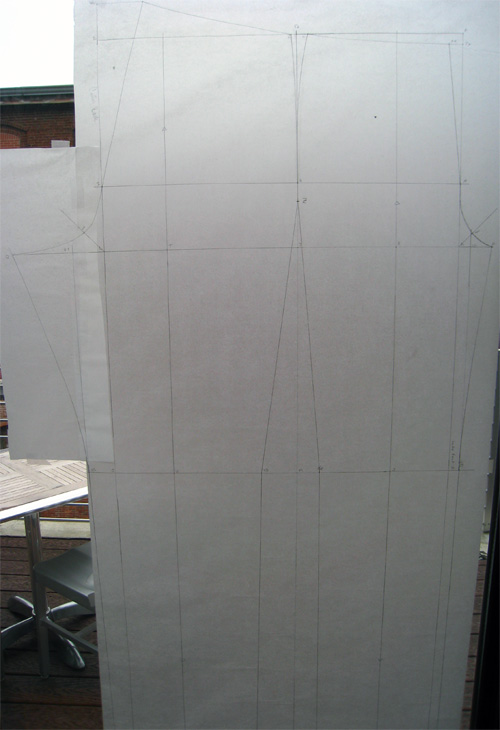
Here is the finished sloper pattern before I cut it out. I had to tape it to a glass door to be able to see the lines. The lower body back is on the left side, and the lower body front is on the right. From here, I cut out the front and back pieces in muslin for a test fit.
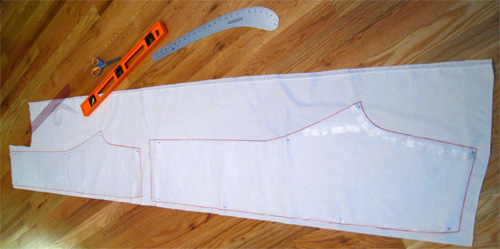
As I mentioned above, the jeans sloper has no pockets, yoke, or any details. It is just the fronts and backs sewn together to make sure I took proper measurements and that the basic shape and fit is correct.
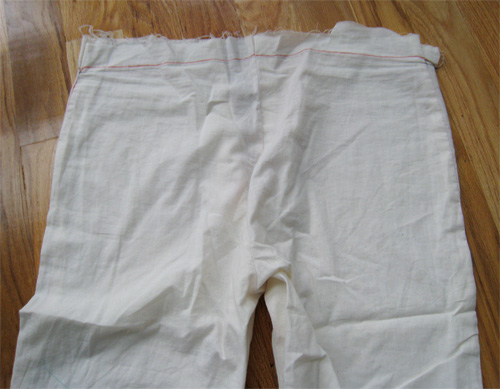
My sloper fit great and I didn’t need to modify it to begin creating the jeans pattern. The book gives instructions for turning the sloper into a pattern, showing where to modify specific points on the sloper to create individual pattern pieces including pockets, yoke, waistband, fly, etc. I used these instructions as a starting point, but completely altered the shape and measurements to suit the style I was looking for. I wanted a somewhat slim fitting, straight leg, five pocket jean. The “straight leg” version in the book seemed more like a tapered leg to me so I changed the shape of the leg. I also changed the shape of the yoke, back pockets, front pockets, position of the crotch point, and the fly, arriving at my final pattern. The pattern in the book called for a zipper fly, but I decided that I was going to learn how to construct a button fly instead.
Once all of the pattern pieces were complete, I had to add seam allowance to all of the individual pieces. I used 3/4″ seam allowance for any areas where I would be doing a flat-felled seam, and 5/8″ everywhere else. These allowances are probably a bit big for muslin, but when I start using real denim, I want the flexibility to work with a bigger allowance.
I drafted all of the pattern pieces in tracing paper. Here is a picture of my final pattern. At this point, I hadn’t finished the fly so those pieces are not shown.
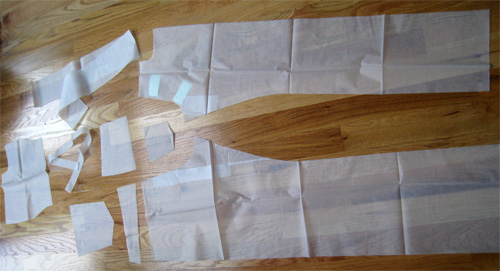
The next step is to cut out and sew this pattern in muslin to see if everything goes together properly, and to check the fit again. Pattern drafting was actually quite enjoyable. I feel like it is the perfect right and left brain collaboration, using geometry/math to achieve something more creative.


Pingback: Second Muslin Pair of “Jeans” — TaylorTailor
Pingback: Selvedge Denim Recap — TaylorTailor
Hi Taylor!
Google linked me to your website when I searched “menswear patterns”. I’ve been looking at patternmaking books as well, and was wondering why you chose Knowles’ book among the others. I’m torn between hers and Aldrich’s “Metric Pattern Cutting for Menswear”.
As an absolute beginner to sewing/patternmaking, hope you can share how much this book helped.
Pingback: Men’s Shirt Sloper — TaylorTailor
Hi Taylor,
I noticed when I made my sloper with muslin that the waistline comes all the way up past my belly button. Did you lower the rise in the front and back, and if yes, how?
My guess would be just to draw a parallel line to the waist just a couple inches down, allowing an additional 1.25-1.5″ for the waistband?
Thanks!
Hi Andrew,
Depending on which method you used to draft your sloper, it would make sense that your sloper comes up past your belly button. Some sloper instructions use your “natural” waist (smallest part of your torso), which is typically above your belly button as a reference point. If you measured the length of your leg based on where your “natural” waist sits, then your sloper would come up to this point.
You can definitely lower the rise, and drawing a parallel line to the waist is what I did with mine once I figured out where I wanted the top of my waist band to sit. If your sloper tapers near the hips, then make sure you accommodate for this with your new waist line. Your waist could end up being too big if you don’t adjust the curvature at the hips.
I hope that helps! Let me know if you have other questions, or if I can explain things further.
Taylor
I also had somewhat sad results with the Burda 7733 and haven’t found any proper books on this topic yet, thanks for pointers into the right direction!
How long does this “step” take in the process for a total beginner? I am willing to put the work in, but I wanted to know how much time it requires so that I can budget my time accordingly.
Also, aside from the denim and materials needed, how much are the other tools if you already have a machine to sew on?
Thanks!
Hi Steve,
I didn’t time myself, but this step (or steps) was a serious time investment. I should note that I am slow and meticulous so it may have taken me longer than it might take you. If you are new to this, I would estimate at least a half a day to accurately take the measurements (you will need someone to help) and draft the sloper. Then a couple of hours to cut out the sloper and test the fit in fabric.
Assuming it fits and you don’t have to make any alterations, I would figure anywhere from 4-8 hours to turn the sloper into an actual jeans pattern, and add seam allowances. Again I am slow, and these times are just estimates. I did this over 2 years ago.
Taylor
Hi Taylor,
I’ve just finished reading your blog, found it through another blog that I follow. I’m a fairly new seamstress, only made a pair of very basic pants, pyjama pants, and a women’s top so far (all from commercial patterns). (Oh, and two boxers, and some pillow cases. Do you think that after such projects that one can move on to denim jeans and pattern drafting?
I have a denim jeans pattern that I’m afraid to touch because it seems as if I need years of experience first to sew jeans.
I see that you moved pretty quickly from your apron to your vest to your jeans and pattern making. Did you find that difficult to do?
Did you have a lot of experience sewing before the vest and apron?
Hi Carlie,
I had zero sewing experience before the vest and apron. I didn’t even know what a bobbin is. For some reason, a lot of people seem intimidated by jeans. I actually think they are easier than some shirts and other styles of pants. There are some tricky parts your first time around (the fly and waistband), but with a little practice you can easily learn these steps.
I say go for it! My main suggestion would be to practice with some really cheap fabric first. Make a couple of test garments with your pattern, adjust the fit as necessary, and then transition to denim.
Once you’ve made a successful pair of jeans with your commercial pattern, then I think you would be ready for pattern drafting. I am by no means an expert, but I found that knowing some basic construction techniques was helpful when drafting my pattern.
Feel free to let me know if you have any other questions.
Taylor
Thank you Taylor, I just finished acquiring some of the books that you mentioned here and I bought a ton of muslin at the store. It’s a great idea to practice on that instead of on my fancier fabrics. Thanks you for your advice. I’ll visit your site often. *bookmarked*
Hi Carlie,
I would add that in order to practice, you don’t have to make a full length jeans. If you treat it like “shorts” then you still have the pockets, fly and waistband to practice on (including the hem) – but you would need about 60 cm of fabric instead of 1.6 m.
I’m in this journey myself. I try to sew a commecial jeans pattern with the help of a course that i bought and downloaded. It’s from here : http://www.thesewingguru.com. I haven’t finished, but i have learned a lot.
Hope to have helped.
Thanks for the tip Shmulik. This is a good idea if you want to save fabric. The only problem with not making a full length pair is that you might not be able to tell if your side seam is hanging straight. This is something you might only notice from the knee down, and the fit from the knee up to the waist can have en effect on the lower half of the jeans. Just something to think about.
Good to know that.
Thanks
hello, Taylor!
Please comment on how you adjusted your pattern to achieve a straight side seam to be able to align it with the selvege edge? From the picture in the post I can see that the knee line curves in down from the hip line. Thank you.
The picture shows more or less the kind of pattern for a regular pant if you want to make a jean cut on the salvage then both side seams front an back must be straight at least up to the fr. pkt. line.
all of the measurements seat, knee, and leg opening are pushed out toward the inseam meaning don’t try to build the front around the center /crease line this is a different animal all together. I hope you understand let me know if you don’t.
This pattern is not ‘designed’ with the selvage edge in mind. How did you cut your pattern in order to make it work with your material?
Hi Taylor,
There is another great book called Making Trousers for Men & Women by David Page Coffin that looks like it would also be a great help.
Have you done any more with this project and made any jeans or other trousers from start to finish? It would be great to see the end products!
(I love your bag designs by the way)
Hey Taylor,
When you made the muslin you wrote that it fit well. I’m worried that if I make a pair of raw denim jeans and it fits well at first, that it will shrink to being too small later when eventually washed. Did you make yours a bit bigger to allow for shrinkage, did you wash/soak it first before sewing it together, just not wash them for 6 months, or something else?
Hi Mike,
I make my jeans true to size, and I don’t soak or pre-wash raw denim. (the only exception was a pair of jeans I made for my wife). I always wash my jeans in cold water, soaking them in the bathtub, and always hang them up to dry. I never use a regular washing machine or dryer. This takes most of the guesswork out of calculating shrinkage. The jeans will stretch out a bit over time, so some people actually like to size down to account for stretch, or relaxing of the denim. I suppose it depends on how you plan on washing your jeans. Hot water and the dryer will definitely shrink the denim.
Hi Taylor,
congratulations on your website and your «me-made» clothes. How do I go about modifying my basic jeans pattern to use it with my selvage raw denim? Is it as simple as straightening the outer seam and changing the grainline to be parallel to the selvage? I would like to try it. Thank you in advance! Again, keep up the good work, your jeans look awesome.
Hi Chantal,
That is the basic idea. Straighten out the side seam, and then carve what you need to out of the inseam to adjust the fit. Your grainline will be parallel with the selvedge. Definitely make a test version with scrap fabric before cutting into the denim. Let me know if you have other questions.
Having worked in the fashion business for 33 years as a fashion designer and pattern maker then technical designer. It is impressive that you are able to follow a pattern book and have success in the process. Bravo to you Taylor. I am interested in teaching online at this point in my career, and would like to know if I put some videos together showing how to make patterns from scratch if there would there be an audience for them? Can I have some suggestions on the topics people would be interested in?
Cheers!!
Geo
Pingback: Giant List of Denim Patterns, Classes and Tutorials - Skirt Fixation