How to Insert Jeans Rivets
I know this is a scary subject for some, but once you get the hang of it, I actually think installing the rivets and buttons is one of the easiest aspects of making jeans. I installed a rivet in this example, but the steps and procedure for installing a button are exactly the same.
Step 1. Gather all of your tools and supplies.
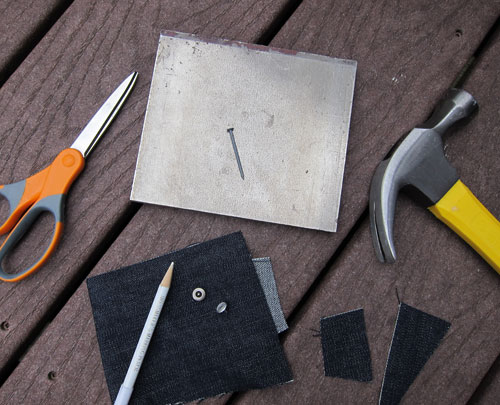
I am using a piece of scrap denim for this example, but your jeans obviously need to be ready for the rivets. Installing the rivets and buttons is one of the last things I do.
You will need:
- Rivets
- Marking Tool (I use a chalk pencil)
- Scissors
- Hammer
- Nail (roughly the size of your rivet)
- Hard surface to pound on (I use a smooth steel plate. This isn’t entirely necessary, but since it is so smooth and hard, it won’t scratch the rivet cap [burrs] as you pound)
- Denim scraps to use as spacers if necessary
Step 2. Mark the spot where you want to insert your rivet.
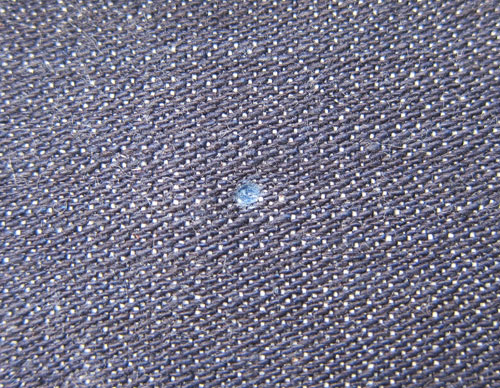
It may be difficult to see, but I marked a blue spot in the middle of the image above.
Step 3. Determine how many layers of denim and pocketing fabric you will be inserting the rivet through. Depending on how thick your denim is, and how many layers you have in the spot where you are inserting the rivet, you may need to use some spacers. If the rivet is too long and you don’t have enough thickness, you can over pound the rivet, causing it to go in at an angle. This is bad, don’t do it. Your rivets may come out if they go in crooked. To solve this problem, you need to add two or three layers of denim on the back side of the rivet. You might be able to cut the rivet down, but I prefer to use spacers instead.
I am inserting the rivet through two layers of denim in the example, and decided that I need two additional layers for the back side of the rivet. Just use some scrap denim. Poke a hole using your nail (Step 4, below) and insert your rivet.
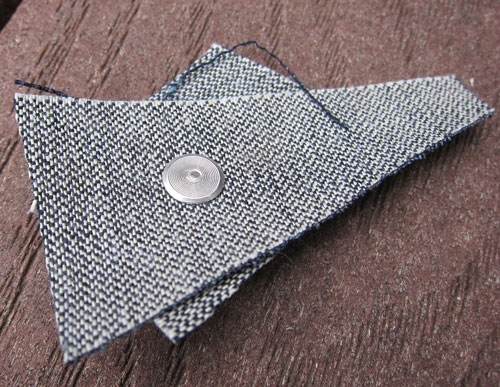
Then trim around the edge of the rivet head, eliminating the excess denim.
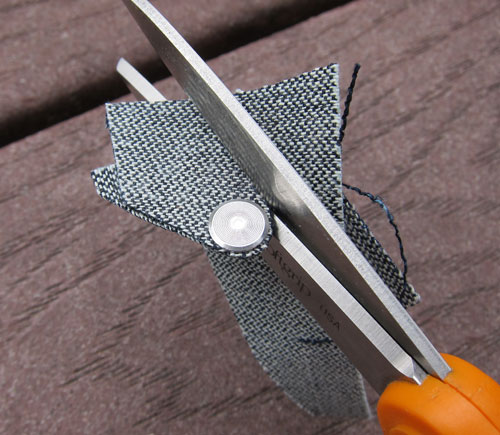
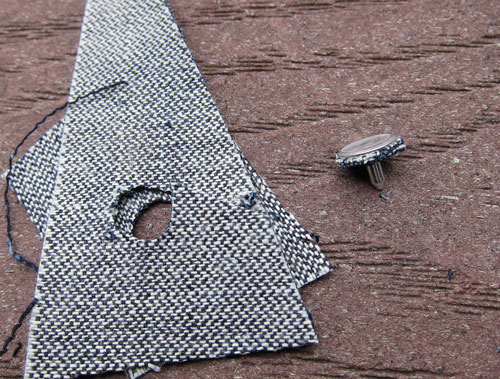
Now your spacers are done.
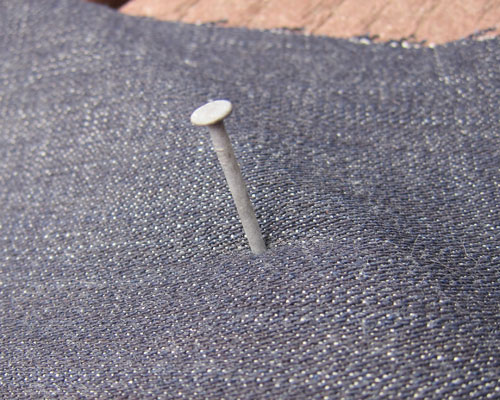
Step 4. Poke a hole through your denim with your hammer and nail. You can use this same method to poke the hole for the spacers as well.
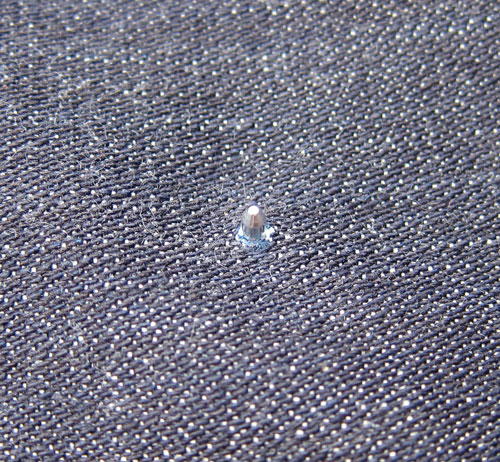
Step 5. Insert the rivet (with spacers) through the back or wrong side of your jeans in the same hole you poked in Step 4.
Step 6. Flip your rivet cap, or burr, upside down on your pounding surface.
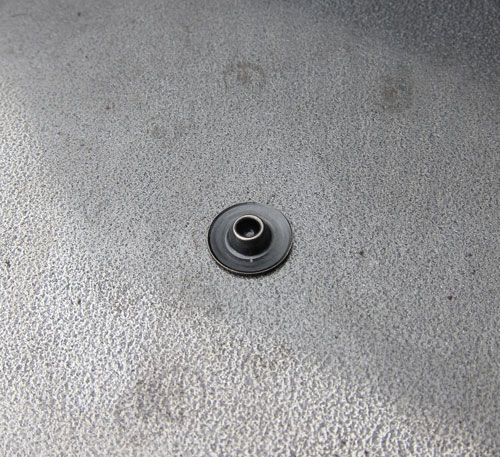
Step 7. Turn the right side of the denim over, and align the rivet with the hole in the back of the rivet cap.
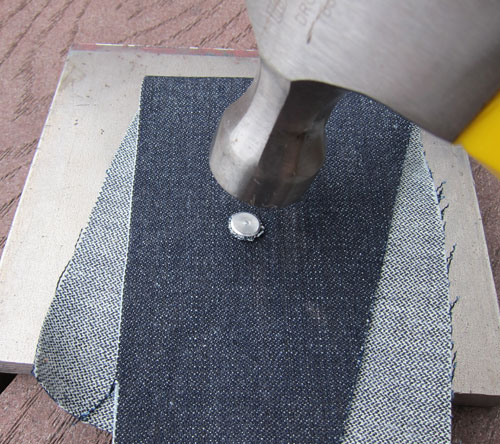
The rivet cap is upside down under the denim above.
Step 8. Lightly hammer the back of the rivet, but don’t pound it all the way in yet. You want to make sure that the rivet is going in straight. You should be able to pick up everything and check. The little bit of pounding you have already done should hold the rivet cap in place.
Step 9. If the rivet is going in straight, then finish pounding it in until the rivet cap lays flat against the surface of the denim (on the right side). You really don’t need to pound that hard. Take it easy, rivets are your friend. With regard to jeans buttons, you want to pound until the button no longer turns in place and feels solid.
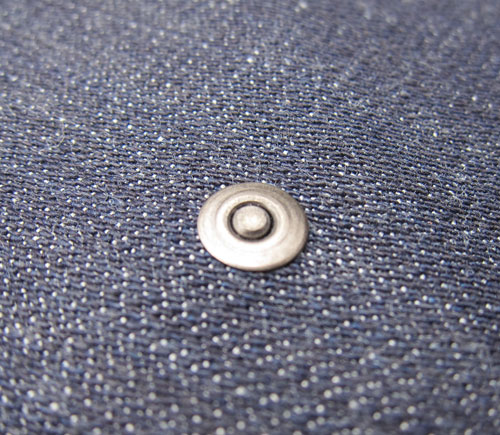
Tada, like magic. Finished rivet.


Excellent tutorial. Note to self- pound less.
My banana republic jeans use a leather spacer for the button, it looks really nice. I initially thought it was to keep the hole from falling apart, but reading your blog makes it more likely that it is used to space it out.
I want to get started on designing some clothing, are jeans the best place to start? When you were searching for denim did you come across 98 cotton 2 spandex? I have a pair of Patagonia jeans I really like, but I’m certain that even I could do a better topstitch than they did (they being a factory in India).
Hi Scott,
In my experience, jeans are easier than shirts, and definitely easier than jackets to design and to construct. There is quite a bit of denim blended with other stretchy fibers like spandex. For really tight fitting jeans such as skinny jeans or some styles of women’s jeans, you might want the stretchy fibers. Some pretty big brands do use some spandex in their men’s jeans, but I’m sort of a purist and go for the 100% cotton varieties of denim.
To be really opinionated about it, I don’t think stretchy fibers belong in men’s jeans at all. I like my denim raw, untreated, unwashed, and stiff as a board!
Taylor,
Thanks for replying to both of my questions, I did some more research after posting, Cone mills makes a 31″ selvedge denim that stretches. If I can design a pattern that I like I’ll make a pair with the 100% cotton, like you did. I wear jeans almost exclusively, but I do a lot of rock climbing and cycling so having a bit of stretch makes em a lot more comfortable.
When you initially bought the denim for your jeans were you able to buy it by the yard? I can only find wholesalers online willing to sell me a whole roll.
I never thought of doing those kinds of activities in jeans, so in that case I guess a little stretch would be helpful. I did buy the first denim by the yard, but lost the contact. I’m not sure if you are aware, but I actually sell Cone Mills selvedge denim. It is all 100% cotton and available through the “Supply Shop” link at the top of the page: https://www.taylortailor.com/shop
The 100% cotton will soften with time and mold to your body. It actually becomes very comfortable once broken in (but I’ve never done any rock climbing in it, haha!) I’m not sure where you could find any stretch selvage denim in really small quantities.
I keep making holes on the front rivet, I put 4 layers of leather in between…
Help!
Jeremy,
I’ve never had that happen before. I assume you are hammering the “nail” part, and not the front part of the rivet, right?
What type of surface are you pounding on? It sounds like you might be over hammering, or hammering too hard. If the surface under the front of the rivet (or burr) isn’t hard enough, I suppose that might cause you to poke a hole in the front.
If you also bought buttons from me, make sure you are using the right “nail” or tacks with the rivets. In other words, don’t use the button tacks with the rivets.
Taylor
Thank you Taylor,
I was using a piece of pine, I should try oak…:-)
I’ll let you know when I receive more rivets from you, if I can figure this out.
I would probably try to find something harder than oak. Try to find some steel or concrete. I use a steel plate that supports that front side of the rivet. I bet that was your problem. Pine is pretty soft.
Taylor-
Hi Taylor,
first of all, thank You really much for doing this supply-shop thing. I am from germany and I ´ve been trying to find good selvadge denim for over a year now! I received Your stuff a while ago and am now in my last steps to finish a denim jeans for a friend of mine. It will come out pretty nice I guess! The denim quality You sell is the best one I held in hands for quite a while!
I wish, I read Your tutorial about riveting first, before starting to pound those in. I damaged a whole set of 10 copper rivets, before I read the tutorial and now I had to use the brass rivets for the jeans. But they came out great and using the spacers does really make the difference!
Thank´s a lot!
Michael from germany.
Hi Michael,
I’m thrilled you like the denim! The spacers and pounding gently on a very hard surface make a huge difference when inserting rivets without a rivet press.
Taylor-
Where can I buy good jean rivets? I have tried brands like Dritz but they keep falling off and are no good.
Hi Angela,
I sell jeans rivets and buttons in my Supply Shop. https://www.taylortailor.com/shop/
The rivets I sell are high quality, professional rivets.
Pingback: Ginger Made: Style Arc Romy Anorak (Or, the Jacket that Took Forever)! | Ginger Makes...
I had to make a few adjustments, I cut the nail (back of rivet) down, used a harder surface, and it worked beautifully! I started with leather washers to build up bulk but it wasn’t enough. Glad I stuck with it, the rivets and button make the jeans. Thank you!
Hi Taylor, have you found that four layers is usually enough for the rivet, and is it safe to say you were using a 13 or 14 oz denim in this example? I just put your rivets through about 6 layers of 13.5 oz denim and they fit well. Like Jeremy, I was also using a wood block as a base to hammer on at first and was going right through the rivets on the first or second blow. Concrete worked, but it scratched up the rivets. A 16-gauge steel strong-tie plate (like you can get for a couple bucks at a hardware store) worked best.
Hi Eric,
I think the denim in this example is around 12.5 oz. 4-6 layers of denim depending on the weight of the denim should be enough
Hi Taylor, I am trying to make designer jeans and I like pretty flashy buttons and rivets but I have found that finding denim buttons that I like is hard to find if next to impossible for me. Do you know of any place that I could find denim buttons and rivets for designer jeans? Also, can you tell me what the standard button size is for jeans? I like the silver color the best but I like other colors as well. Any help or information would be great. Thank you so much. Tammy Altic
Pingback: Pantsmaking Resources: Fitting and Construction