Waxed Canvas Backpack

When I first started thinking about making a back pack, I knew I wanted to use canvas, and I knew I wanted a simple “traditional” design. My goal was to create something that could hold a couple days worth of clothing for a weekend getaway, or be used as an airplane carry-on. Serious hiking, climbing, or long heavy hauling were not factors I considered when designing and constructing this pack. For inspiration, I looked to both the Archival Rucksack and Makr Farm Ruck Sack, which both seem to be nicely designed and well made.
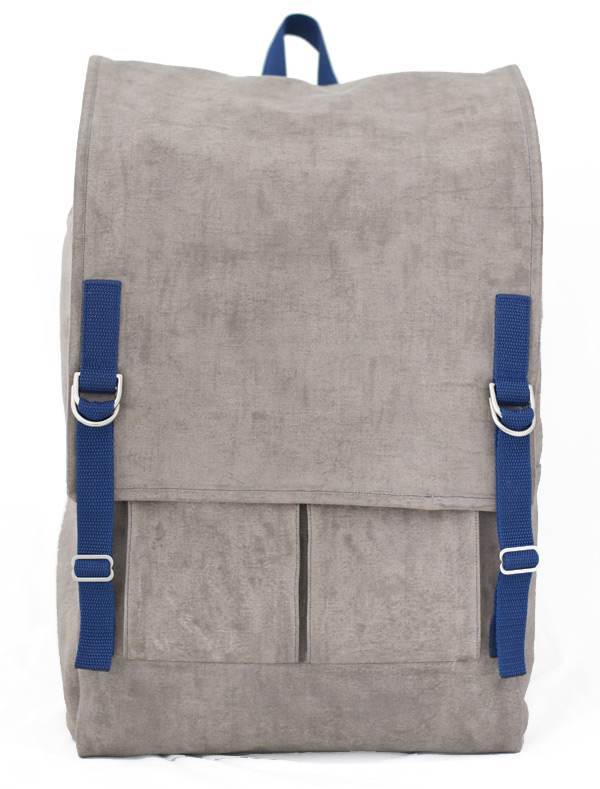
The pack features a double layer of canvas throughout the body and flap for durability and some structure. Ideally, I would have preferred to use one layer of really heavy canvas, but as I mentioned in the post about the canvas I dyed for this pack, I found the canvas on sale and couldn’t pass it up. At the time it was the heaviest canvas available in the store, and while I saved a little money, I should have just bought the right fabric to begin with. All things considered though, I’m pretty happy with the way it turned out.

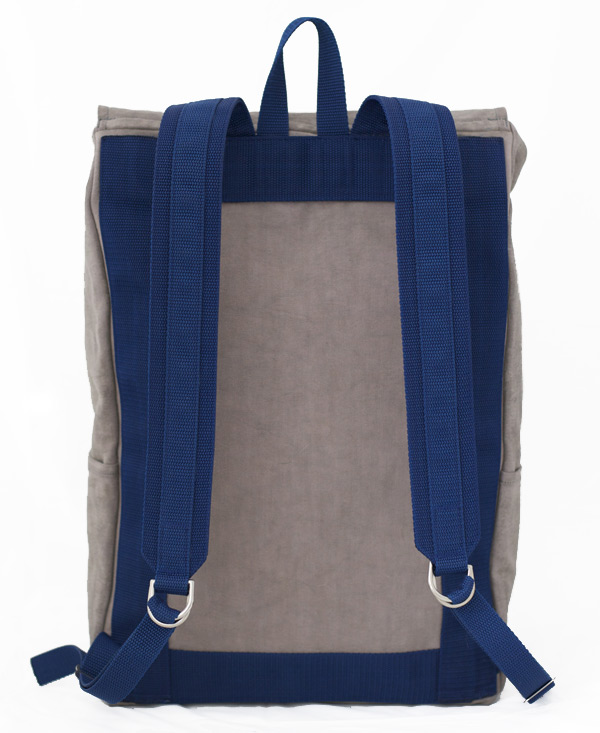
All of the blue webbing is polypropylene, and while it isn’t my preferred material, it was easy to work with. Cotton webbing would have been a nice option, but was difficult to find in small quantities. I also thought about using leather for the shoulder straps and flap closure, and on a future pack I may do so. Working with leather, however, requires a lot of practice, special tools, and skills that I haven’t even begin to learn.
For both the shoulder straps and flap closure I used a simple double D-ring setup for adjustments. This works great for the shoulder straps because I don’t need to change the length of those very often, but the D-rings make getting into the main compartment a little difficult. On my next pack, I will probably use different hardware such as a lobster claw, or some type of snap hook to close the top flap.

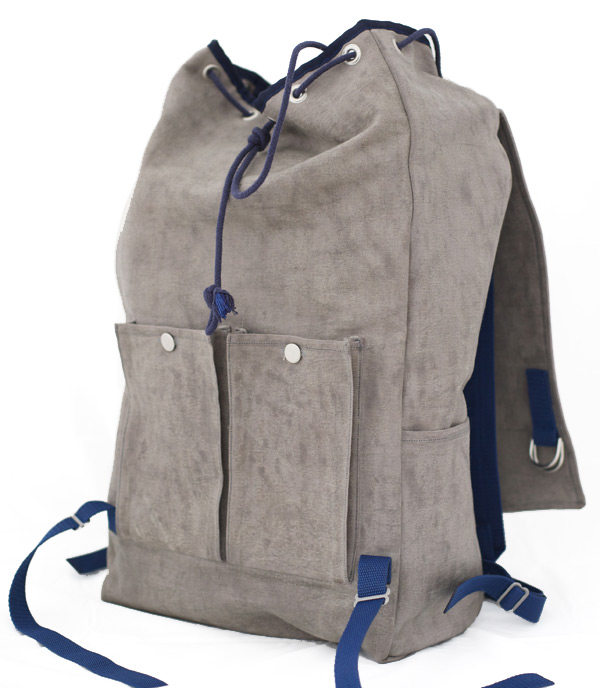
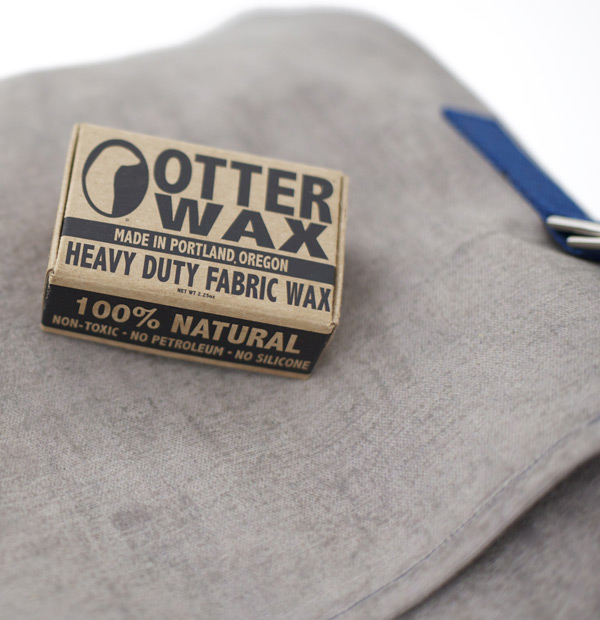
The main compartment closes with a drawstring woven through grommets, which were surprisingly easy to install. I decided to lightly wax the outside layer of canvas with Otter Wax to give some texture, a weathered look, and most importantly, resistance to water. I should probably apply a heavier coat for more protection, but this is something I can do at a later date. I chose Otter Wax because it is a natural product, is environmentally friendly, and is relatively easy to apply. The two outer pockets have slots for pens/pencils, and close with a jeans style button. There are also several pockets on the inside for thin, low profile items.

Materials and hardware:
(materials are approximate measurements and are usually more than enough)
- 2 yards heavy canvas
- 16 ft. 1″ webbing
- 12 ft. 2″ webbing
- 8 D-Rings
- 4 metal slides
- 2 jeans style buttons,
- 16 size #1 grommets
- 2 yards 1/4″ rope for draw string
- Heavy topstitching thread
- 5 yards 1″ bias tape, or twill tape to finish inside and top opening seams
- Fabric dye and wax, optional


Taylor, your stuff never fails to impress me. Everything you make looks so neat and professional. I guess you’re taking the right approach to sewing. Taking it slow and going for quality instead of quantity.
As sewing time is spare at the moment, I tend to rush through my projects because with time limitations, it takes me forever to finish something anyways and I don’t have the patience to rip out stitches when top stitching is a bit off ect. because it will do. I’ve just got too many ideas I want to realise…
I am so inspired by your blog. I love to sew, but do not do it as often as I would like. All my projects are For the home, i.e. pinch pleat curtains, roman shades, duvet covers, pillows, etc. I have always wanted to try experimenting with making my own clothing, but I have been too intimidated to try it! You give me hope. I even passed this blog along to my eighteen year old son who loves jeans! He couldn’t believe how amazing yours looked. Just like the ones he likes that run upwards of $300 dollars!
Can you recommend one book that got you started and really helped you with some of the basics for sewing clothes? I am sure you can recommend several, but I would really like to find a starting point.
Thank you for sharing. I also love the simple design of your blog!
Ashley
Marvelous job, Taylor. What an elegant backpack!
The recipes on your blog look delicious! You are right, it is hard for me to recommend just one book. It really depends on what you want to make. I think you will find a lot of similarities between home sewing projects and clothing. I can recommend one author, David Page Coffin. He has books for sewing shirts and trousers (for both men and women).
You can actually learn quite a bit by just inspecting store bought clothing as well.
Thanks Peter! I’ve been sending lots of people to your shirt and jeans sew-alongs. Now that I’ve discovered your vintage sewing machine post, I’ll have to start sending people there too! I get questions about vintage machines and I don’t know much about them.
Great backpack Taylor… I am a new MALE sewer (we are far and few in between it seems) and I follow what you and Peter do. I am so inspired by this backpack. Would love a pattern for it 😉 I plan on starting a sewing blog myself to track my progress. Hopefully we can talk and touch bases…
Keep it up!
Hi Gunner,
Thanks! Good luck with your blog and future projects. Let me know when you get it set up.
that soft grey is an amazing colour… I love the idea of making a backpack but worry my skills aren’t up to it yet..
🙂
oh and check out http://infusionfibers.wordpress.com/
this lady has some very good taste in design of all sorts.
I’m sure you could make a backpack 🙂 It was actually easier than sewing clothing. I suppose it depends on the design, number and type of pockets, etc., but if you keep things simple, it isn’t as intimidating as it might look. Thanks for the link. Her work is amazing!
I followed a link back here that showed up in my blog stats (thanks Allison!). Taylor, your work is impeccable, and your mission is really inspiring! Your wardrobe looks sharper than most any men’s wardrobe I’ve seen.
Thanks Abby! Your work is quite stunning. I love the clean yet functional design of all your pieces, as well as your photography. I’m looking forward to seeing more!
Love your blog and the content. Just fantastic.
I was wondering what sewing machine you used to make the bag. I assume an industrial?
Much thanks,
Martin
Hi Martin,
Yes, I used a single needle industrial straight stitch machine, but I think a pack like this could be made with a decent quality domestic machine if you go slow and take your time.
Taylor
hi, taylor! i just found you via ladybird’s nashville blog roll (i was clicking around to see who i haven’t “met” yet!). i’ve been enjoying scrolling through your posts but my gosh— this bag is incredible! i can’t wait to start following along to see what else you create.
Thanks! I’m looking forward to checking out your blog. Always nice to hear from other Nashvillians!
Taylor
Is there anyway I could get a pattern for this style of bag? I have made others but I just don’t like them and yours from what I have seen is great. I am also one of the few male sewers in my area. It would be amazing if you could get back to me soon.
Hi Tommy,
Right now my patterns are not in a form that could easily be replicated and sent to someone. I don’t have instructions for the pattern, and I’m the only one at this point who could make sense of the different seam allowances in different places.
Sorry I can’t be more help.
Hi Taylor,
I love all of your backpack designs…and I love the scale. What approximate dimensions are your bags? I’m going to make my first backpack this week and am struggling with deciding on final measurements. I love your proportions!
Thanks!
Diane
Thanks Diane,
I’ve made various sized packs ranging from around 18″ x 13″ x 6″ on the larger side, to 16″ x 11″ x 4″ on the smaller side. It sort of depends on the purpose of the pack and materials you are using.
Thanks! That’s about the range I was looking at so that’s really helpful.