Shirt Sloper Continued
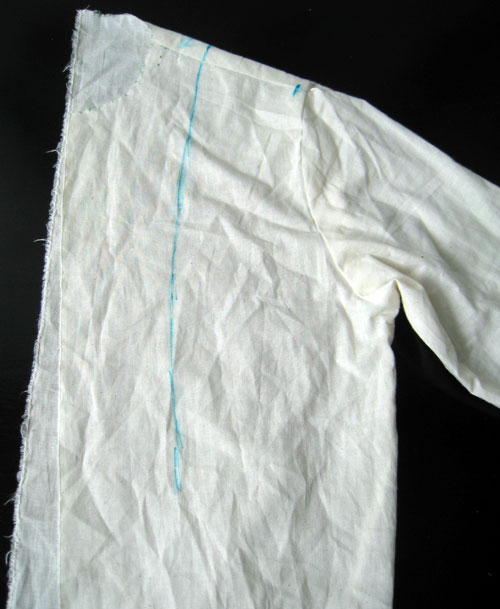
So I finally finished my men’s shirt sloper by adding the necessary ease across the upper back and chest area. I am going for a somewhat slim fit with this shirt, but let’s face it, I still need to be able to move and breath with some comfort. To determine where I needed the extra room in the sloper, I tried on the version below for my totally awesome pattern drafting/sewing teacher. She drew vertical blue lines in the areas that were too tight.

From here, I carefully matched up my pattern to the muslin test sloper, and then transferred the blue lines to my pattern paper. To add the ease to the pattern, I cut along these lines and spread open the front and back pattern pieces as seen below. I inserted some scrap paper underneath the cuts in the open area, and attached these pieces with tape.
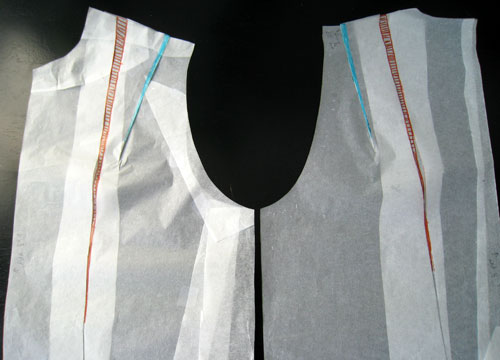
Below are the final front and back to the shirt sloper. The orange area is where I added ease across the chest and back. One consequence of spreading the sloper at the shoulder seam was that this created a shoulder seam that was too long. To fix this problem, I folded out the extra length along the seam, which I marked with blue in the photo below.

Now that the sloper is finished, I can begin tweaking it to design my shirt pattern.


