
Getting Started: Making Your Own Clothes
From time to time I get e-mails from readers who are interested in learning how to make their own clothing. Those who get in touch are usually looking for a starting place or advice on which sewing machine they should buy. Since TaylorTailor is three years old this month, I thought I would try to share my thoughts on the topic. This is mainly intended for those who have never sewn anything before and is in no way comprehensive. You might be disappointed if you are looking for technical advice or a step-by-step guide; buy this model of sewing machine, buy this special book, turn to page 9, and BOOM, you will have a pair of jeans. Instead, what follows are basically the steps I went through to get started. Hopefully it is helpful to others who might be thinking about learning how to sew.
I am in no way an expert, or have any formal training with pattern making or sewing. While I do have an amazingly helpful mentor/teacher here in Nashville, I’ve learned quite a bit on my own as well as from other blogs and websites. I may not do things the way a professional pattern maker or commercial sewing factory would do them, but I do what works for me with the knowledge and equipment I have on hand.
My first bit of advice is that you CAN do this. Don’t let lack of knowledge stop you from trying something new. I had no idea what a bobbin is or what seam allowances are when I started. With that said, making a piece of clothing that looks like it came from a store, that you are proud to wear in public, is hard work. Don’t expect to complete a shirt in a Saturday afternoon or quickly throw together a pair of jeans. This stuff takes time, lots of it, especially if you’ve never sewn before. I don’t mean that last part as discouragement. If your expectations are aligned properly going in, you won’t be disappointed when you’ve spent several weeks on the same project and it still isn’t finished. Take your time, learn as you go, and enjoy the process however long it may be.
1. First, decide what types of garments/accessories you want to make, and try to gauge how committed you are going to be to learning something new. This will have an effect on how much you budget for your first sewing machine and which type of machine you decide to buy.
2. Get a sewing machine. Choosing the right machine really comes down to budget, personal preferences, and in some cases, the types of things you want to make. Here are the machines I use. I can’t make a specific recommendation for a machine that will work for every beginner, especially if I’ve never used it myself. Sewing machines generally fall into two categories, those made for “domestic” or “household” use, and industrial sewing machines.
- Pros of household/domestic sewing machines: portable, take up little space, most can do a variety of stitch types, they are versatile.
- Cons of household/domestic sewing machines: lack power and speed, not ideal for really heavy materials, they can be less durable, although I’m sure a good household machine that is properly cared for can last quite a few years.
- Pros of industrial sewing machines: powerful, retain power even at low speeds, ability to sew very fast, heavy duty (note: this doesn’t mean that they can all sew heavy duty materials. Depending on the machine, they can be set up for light or heavy work), made to do one task (such as a straight lockstitch) and do it really well.
- Cons of industrial sewing machines: uni-taskers – generally they can only do one type of stitch, need different machines to do different types of stitches (straight, zig zag, bar tack, etc.) not portable, weigh a lot, need dedicated place to put them.
I’ve never had any problems with my industrial machine. The thing just works, and it works every time I turn it on. No fuss, no babying it, no mechanical issues. All other things being equal, if you have the space and the budget (a simple industrial can be cheaper than a complicated domestic) I would recommend an industrial sewing machine. Again, this is a personal preference, and after researching machines you might come to a different conclusion.
3. Learn how to use your machine. If you don’t have a friend or relative to show you the basics, I would suggest checking out a local fabric/sewing supply store. If they don’t offer classes for beginners, they are likely to know someone who offers private lessons who can get you started. Once you know a few basic things like how to adjust the thread tension, how to wind a bobbin, how to back tack, and how to change a needle, you are ready to start with your first project.
4. Keep it simple for your first couple of projects. I wanted to start with a three piece suit when I first got interested in sewing. My wife talked me down and convinced me to start with an apron. I’m glad she did. I’ve been sewing for three years and I’m still not ready to tackle something like a mens suit. There are lots of commercial patterns available for beginners. With these simple projects you will develop your sewing skills, continue to learn the quirks of your machine, and get a feel for what you like and don’t like to sew.
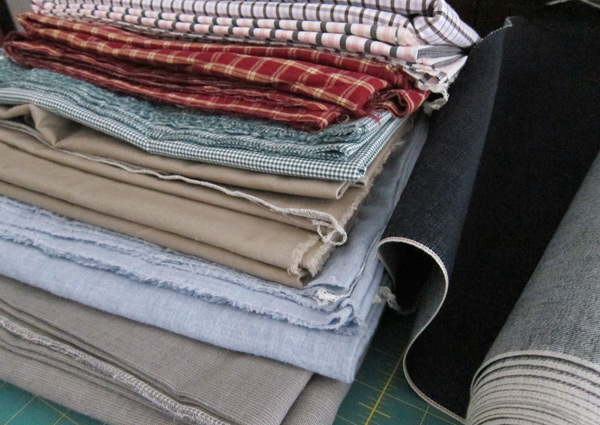
5. After “suffering” though a few aprons or pairs of pajamas, choose a project that is a little more complicated, something that might eventually turn into a piece of clothing you wear in public. For me, this was a pair of jeans. You might find a commercial pattern for this project, or you might want to make your own pattern. Besides having a genuine interest in learning how to design and make my own patterns, I also decided to do so out of necessity. The commercial pattern business really seems to focus a lot more on women’s clothing, which makes sense given that most of their customers are women. But, for a guy who is interested in making his own clothes this left me with few options for patterns, and I’m extremely picky in terms of fit and style. The book I use to make patterns can be found here.
6. Once you’ve decided on a project and have a pattern in hand, make a test garment, or two, or three. For every new pattern I draft, I make at least two or three test garments out of cheap practice muslin before cutting into nice fabric. With each test garment, I make adjustments to the pattern and modify the fit as needed. There is no sense in ruining a nice piece of fabric with a pattern that doesn’t fit the way you want it to.
As far as learning construction techniques goes, there are TONS of sewing books on the market. Here are the two that I use the most often for shirts and pants: David Coffin- Shirtmaking, David Coffin- Making Trousers for Men and Women. Another great way to learn construction techniques and some pattern making is to inspect store bought clothing. You can learn a lot by turning clothes inside out and inspecting seams, pockets, etc. Then there is good old fashion experience. The more you sew, the more you learn, the more the construction part will become intuitive.
Here are the tools I use the most often:
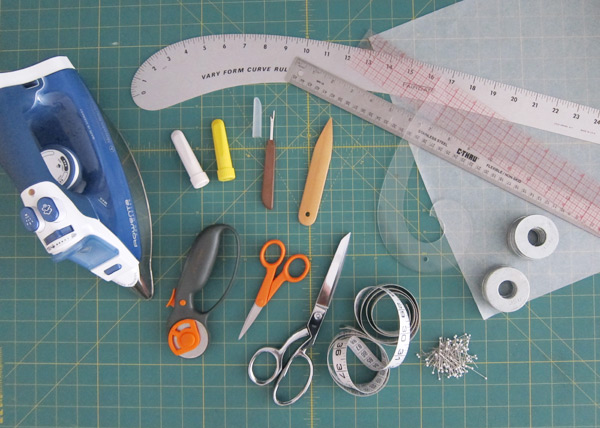
- Iron/Ironing board- If you are just starting out, the iron/ironing board you currently have is probably fine. At some point though, you will want to invest in a decent quality iron and a nice ironing board. For many projects, you will spend more time pressing than at your sewing machine.
- Chalk wheels(s)- For marking positions on fabric.
- Seam ripper- This will be your best friend when you make a mistake.
- Point turner- Not always essential, but can be helpful turning various kinds of points.
- Rulers/curves- For pattern drafting and measuring during construction.
- Tracing paper- For pattern drafting and modification.
- Pattern weights- I like to use large round washers.
- Rotary cutter and cutting mat- When used with pattern weights, the best way to cut fabric in my opinion.
- Shears/scissors- for trimming seam allowances and other cuts, have a pair for fabric only, no paper, cardboard, or other materials which dull the blades quicker.
- Flexible tape measure- Great for making fit adjustments.
- Pins- To temporarily hold fabric pieces together before sewing. Pins tend to distort fabric, so use them sparingly and only when absolutely necessary.
With the beginning of a new year approaching, this might be the perfect time to start a new hobby and learn how to make your own clothing. As always, feel free to get in touch if I can help in any way.
Good stuff Taylor!
When I first became interested in denim I soon discovered that there was only limited resources online for building something that I’d actually wear. I found that between your site and Peter’s sew along (http://malepatternboldness.blogspot.ca/2011/05/jeans-sew-along-1-getting-started.html) I found exactly what I needed to get me started in the right direction.
A year and a half later I now have my own straight leg pattern for selvedge denim that I created in CAD (I’m a mechanical designer by trade). It can be scaled to different sizes with a single click & seam allowances automatically added after the fact so they go out of proportion. I sourced a used heavy duty vinyl plotter/cutter that’s used to cut a new pattern from kraft paper at a moments notice. This is soooooooo much better than taping 8.5×11 sheets together!
For those that might be interested in the extreme world of raw denim there’s the superdenim forum on http://www.superfuture.com. It contains a wealth of knowledge relating to raw denim and some of the worlds most knowledgeable denim heads. There’s even a home-made jeans thread which seems to be gaining some momentum 🙂
I’m still learning with every pair of jeans I build, but if there is anything that I can do to help your efforts please let me know 🙂 Thanks for getting me started & keep up the great work!
Thanks Steve! I’m definitely jealous of your CAD set up. I would love to work on my patterns electronically, but I’m not quite sure about the best software to use and if I could find a way to “import” my existing patterns into the software. Something I’ll explore when I have the time.
Taylor
Great little intro. Here’s hoping more people take on the challenge of engineering themselves good-fitting clothes that suit them!
To add to the comments about sewing machines, an old domestic machine, old enough to be metal-bodied, can be a great compromise between an industrial and a domestic machine for a brand-new sewist. They’re generally a bit more versatile than an industrial and easier to ‘drive’, but usually have plenty of power and are more or less bombproof, unlike newer domestics. Singer, Pfaff, Necchi, White, and Monkey Wards all made some great machines in the first half of the 20th century.
They’re easy to find for less than a couple hundred bucks, so they make a nice entry to allow you to explore your interests and hopefully figure out what direction you want to go with your sewing.
I very accidentally lucked into this approach when I started sewing, and though I now have (ahem) five machines, including two juki industrials, I still frequently use my 60-pound pfaff from 1953. It purrs like a kitten, will handle anything from chiffon to five layers of midweight denim, and is absolutely reliable, with basic maintenance. Completely worth the fifty bucks and a great way to get started.
Hi Scooter,
That is a great point. I have heard lots of good things about the old domestic machines. If I had more space I would probably have one. Without having direct experience though, I didn’t want to try and talk about them. I wish they still made metal bodied domestic machines. I like that they are strong and durable, but take up less space than a modern industrial.
Taylor
Good stuff. Waaaay beyond my capabilities! I recently tried to replace pockets in my denims. It didn’t work out so well.
Making clothes just takes some time and practice. You can do it!
Thanks for this post! I just bought a basic book yesterday but no tools yet! Its a daunting hobby to take up but Im really excited! I will bookmark your website!
Thanks for the encouragement. I’m going to try make myself a bow tie. I’ll let you know how it goes. eeeeeeek
Hello lovely,
Ive heard that many people are learning to sew and I think it’s something I may just be interested in. As my older sister used to do lessons and my mother and nana are pretty good sewers, we have all the essentials needed. I’ve had a quick browse on the Internet and I can’t find online lessons or anything like that, just looking for some tips or something relevant. I’m 12, in year 7, and I’m looking forward to beginning! thank you xo
Hi Kushla,
You might want to check out this website: http://www.tillyandthebuttons.com/p/learn-to-sew.html. The tutorials look to be very straight forward with great images and explanations.
Good luck with your projects!
I have just started teaching myself to sew. It came out of the need to have a skirt but not being able to afford one at the store and having to many jeans i don’t wear. Making jean skirts are fun. Now i have material and teaching myself to make other things. I bookmarked your site and look forward to making my own cloths.
This is such a wonderful introduction to sewing! I have many people ask me similar questions but often forget what it is like when you are just starting out. This will be a great post to share.
Hi i want to start sewing and eventually start my own clothing line, but 1st things first for a person who would be a beginner. What advice does anyone have for me . Thank you
Good day,
I just dont know how to start making a pattern from one of my long pants,
could you please assist, this will be the first time that I will be trying to make a pants, I cant seem to get a pattern of this specific pants, and would like to try and cut my own pattern.
Thanking you kindly,
Salome
Simply do a Google search for “how to copy a pattern from a piece of clothing” and you will see lots of blog posts and instructions.
Hi
– I am looking to start making my own clothes, but eventually want to make my own 3 piece suits. Do you think that is achievable as a hobby?
With lots of practice, patience, and study, I do think it is possible. My goal is to also make some suits at some point.
Hi, I just got a White (Model #88). I hope it is good for making shirts, sweaters, maybe some pants. I am just starting and hoping I wont have to buy another machine.
Thank you for everything! 🙂
Ravel
Hello! I’m looking foward in making my own clothing line, I been really needing help finding tailors around my area, or a tailor period to help me make my designs to live.
Hello:
I am a novice sewer and have various crafts but not clothing. I wish to learn how to sew a men’s button down shirt dress and casual. Are there any beginning patterns available for a novice sewer that aren’t too complicated? Thank you.
Mark
hi, I’m Hannah and I’m 14 and want to try to make my own clothes, but I don’t know how. I could use some tips and hints.
Thanks so much for all that you said which has really encouraged me more to go into fashion designing. Please help me out on what site I can get videos on how to cut mens clothes. Thanks
Thank you so much Taylor. This helps a lot for beginners like me where you get on to a lot of confusion on which type of basic stuff you need to get and work with.
Cheers,
Man alive I’ve been making things all by hand stitching. Mostly smallish stuff like lined gloves, cowls, hats, and a few other relatively small clothing garments. Been wanting to do something bigger. Possibly working with a base pair and working it into the style and fit I want. I greatly enjoy the cyberpunk style but not the price.
I work with a lot of thick cloth and thin to medium leather so I don’t know if a machine within my budget will ever work well. Also a lot of my work right now is with lots of odd stitching that usually isn’t straight and has very little room to work with, which has also steered me away from working with machines.