
Desmond Backpack Sew Along Step 5 – Back/Straps
Today we are working on the back of the pack where all of the strapping comes together. It’s important to make sure the straps are adequately reinforced since they will be carrying the weight of the pack. Last time we left off after completing the shoulder straps.
Handle/Strap Attachment
With right sides together, align top edge of strap backing piece G with placement line on exterior piece B. Stitch pieces together 1/2″ from the edge of piece G.
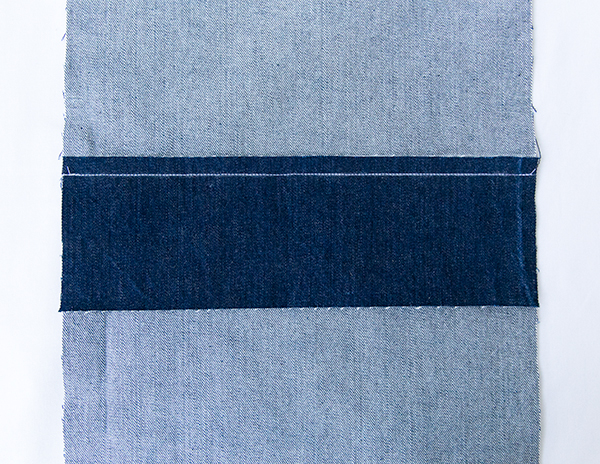
Press seam allowance down, toward the other side of piece G.
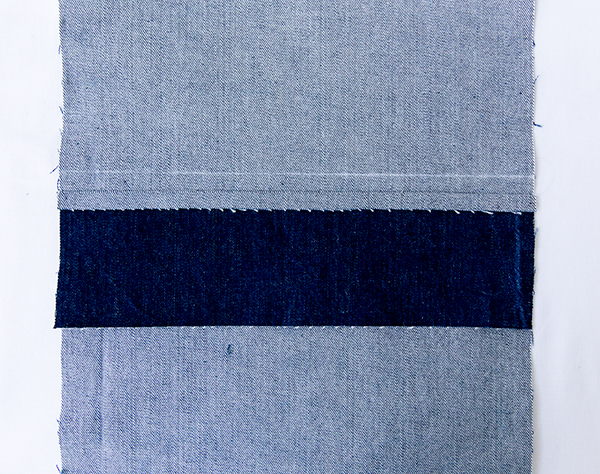
Fold piece G along fold line so that both long edges of piece G are touching. Press flat.
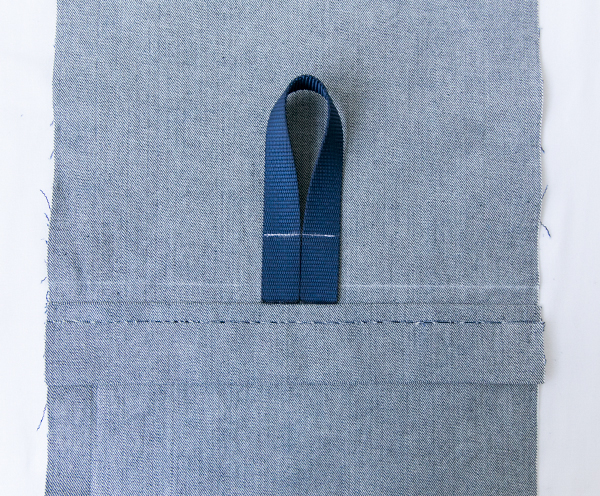
Cut a piece of webbing 12″ long for the handle.
Align webbing for handle on each side of center mark on exterior piece B. Edges of webbing should be touching each other at the center point. The bottom edges of webbing should rest against piece G. Baste in place 1-3/4″ from piece G.
(Optional: if using lightweight fabric, reinforce wrong side of piece B behind strap attachments with fusible interfacing.)
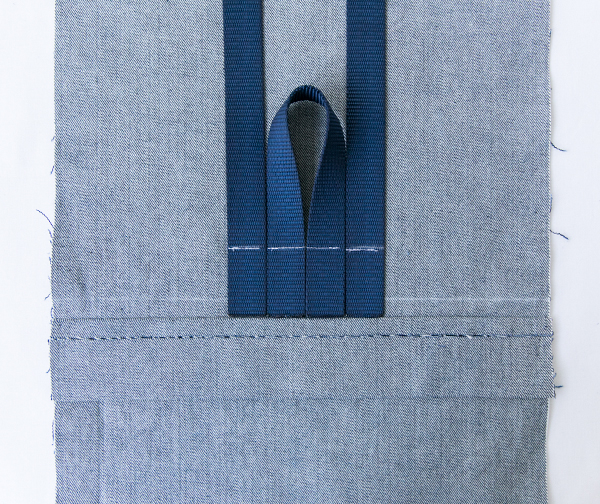
Cut 2 pieces of webbing 20″ long for the roll top closure straps (22″ for natural fiber webbing, ends of webbing will be folded over and stitched down later to hide raw edges). For each closure strap, place piece of webbing directly next to each side of the handle (one on the right side, one on the left side of handle). The bottom edges of webbing should rest against piece G. Baste in place 1-3/4″ from piece G.
Shoulder Strap Attachment
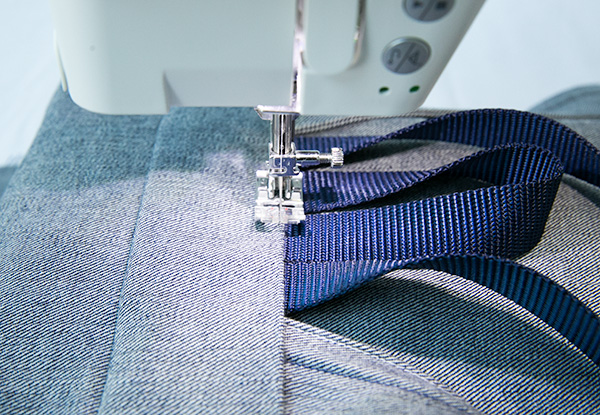
The shoulder straps are placed face down (webbing to the right side of fabric) to the right and left of the roll top straps. The cut angle should be parallel with, and should be resting against the edge of the webbing for the roll top strap, right and left side respectively. Non-angled corner of strap should rest against piece G. Baste in place 1-3/4″ from piece G.
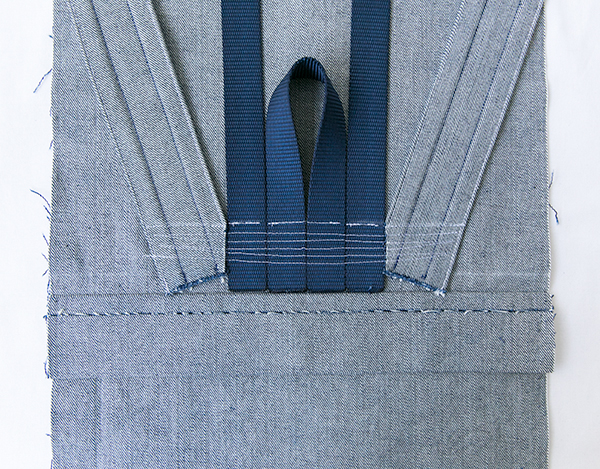
Starting at basting stitches, stitch 5 reinforcement stitch lines (1/4″ apart) through each shoulder strap, roll top strap, and handle. Reinforcement stitch lines should be between basting stitches and bottom of piece G.
Press piece G up towards straps to cover reinforcement and basting stitches. Press flat.
Edge-stitch piece G to exterior piece B along top edge. Over each shoulder strap, roll top strap, and handle strap, edge-stitch an additional 5 lines of close reinforcement stitching. Stitch through piece G, the straps, and exterior piece B. Edge-stitch bottom of piece G.
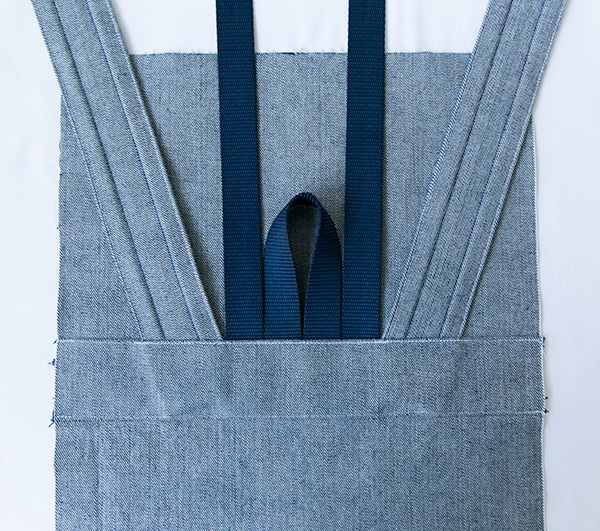
Your completed upper strap area should look like this.
Lower Straps
Cut two pieces of webbing 21″ long (23″ for natural fiber webbing, ends of webbing will be folded over and stitched down later to hide raw edges).
Place each piece of webbing within lower strap placement markings on exterior piece B. Align bottom corner of webbing with edge of fabric. The other corner of webbing will be overhanging edge of piece B. Mark a stitch line on webbing parallel to edge of piece B 1/2″ from the edge.
(Optional: if using lightweight fabric, reinforce wrong side of fabric behind strap attachment area with fusible interfacing.)
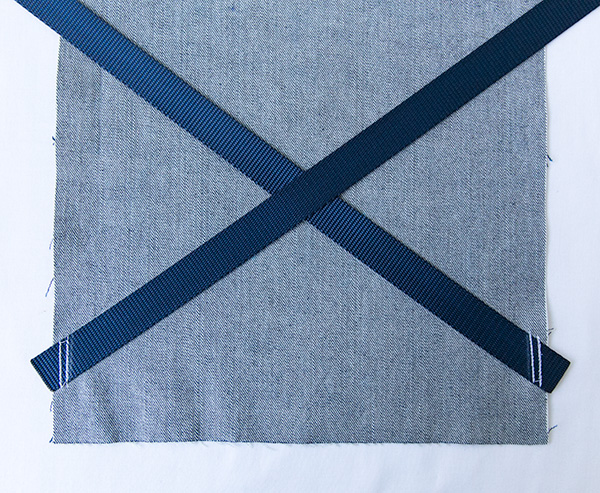
Sew webbing to fabric just inside stitch line using 5 lines of close stitching. Move over 1/4″ towards edge of fabric and sew another 5 lines of close stitching parallel to the first within the seam allowance. This webbing attachment area needs to be reinforced to handle the weight of the backpack.
Up next on Thursday, we will be assembling the exterior of the pack. Since I am taking my time with these sew along posts, and spreading them out over several weeks, you still have plenty of time to grab a pattern and sew along!